
Bassoon Reed Making Series: Splitting Tubes
Posted by Clair Cangialosi, DMA on Aug 31st 2026
This post will cover the first step in processing tube cane: splitting. This is intended for an experienced reedmaker who is ready to start working with tube cane. Access to a pregouger and gouger is recommended for the next stage of the process (covered in a seprate post). It may also be helpful to read Tips For Selecting Bassoon Cane and The Geometry of Tube Cane before starting this process.
Table of Contents
Suggested Materials
- Tube cane (your choice of brand)
- A pencil
- A radius gauge (also called a diameter gauge)
- A cane splitter, razor blade, or an old reed knife
Preparing The Cane
Before diving in, it is important to take time to assess and sort your tube cane to weed out any pieces that will not be usable.
1. Check for discoloration/ weird textures
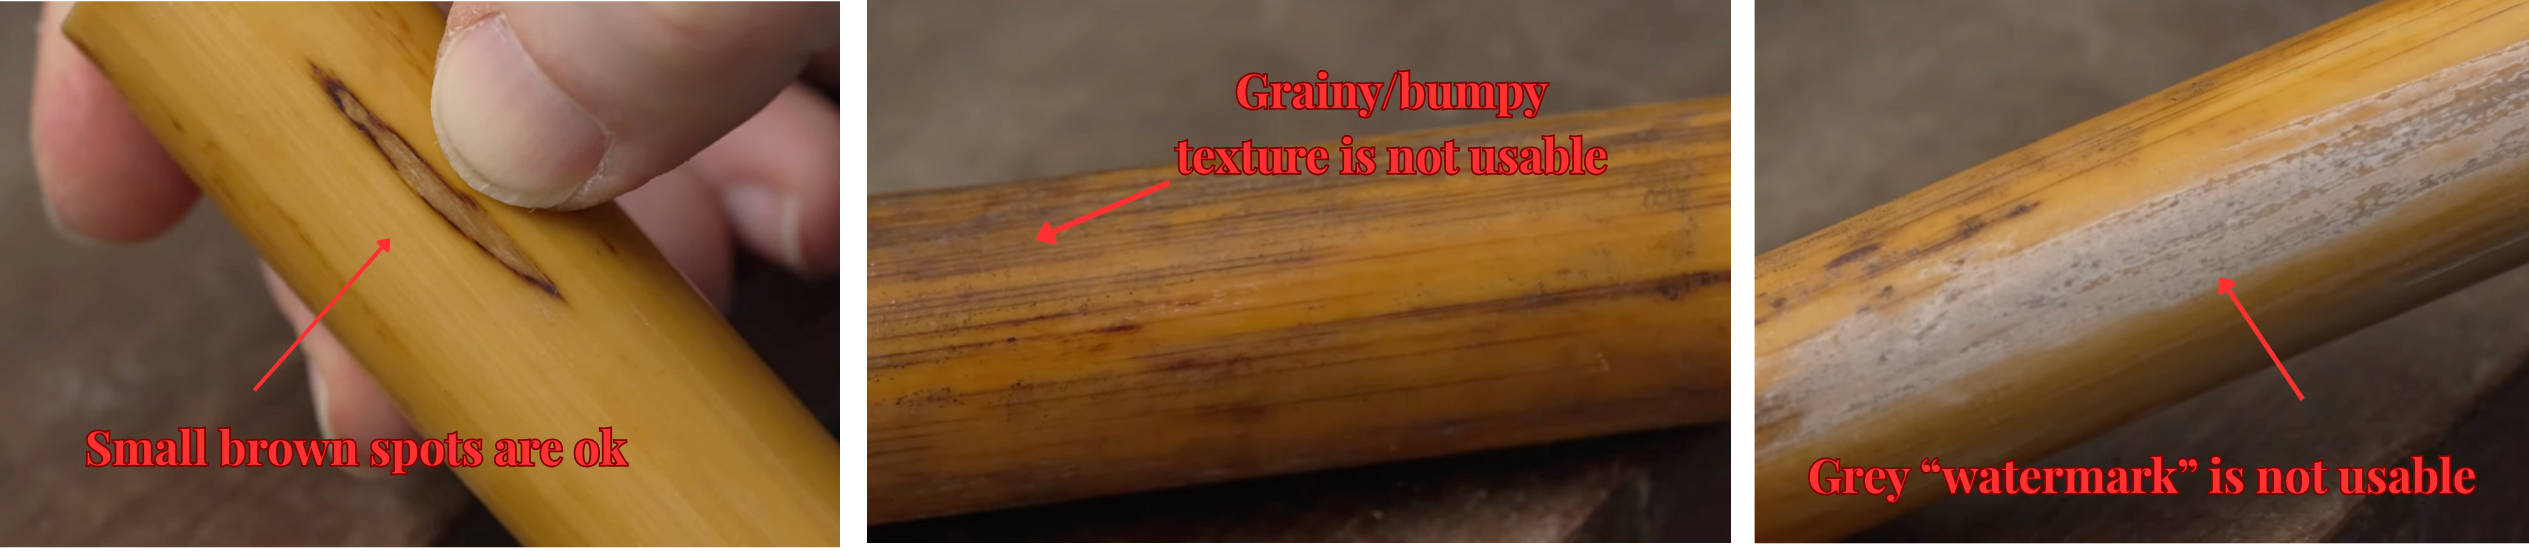
Visually check the outside of the cane and discard any pieces that are green or grey. The bark should also feel smooth (not rough or bumpy). Figure 1 shows examples of cane tube cane that is not usable.
2. Check the curvature of the tube
Bassoon cane will very rarely grow perfectly straight or have a perfectly even diameter all the way along the tube. Eliminating pieces which are severely warped or the wrong diameter will save time in the long run.
Rian Craypo suggests rolling a piece of tube cane on a flat surface such as a table to help find the straightest section. Where the cane curves, there will be a visible gap between the cane and the table, and the cane will rock from side to side. Use a spare piece of gouged cane as a template against the tube to mark the length of the straightest portion with a pencil. Anything else will be trimmed away after splitting. Craypo also recommends marking the center line, (using the center of your spare piece of gouged cane as a guide) which will become the eventual fold line once the cane is processed.
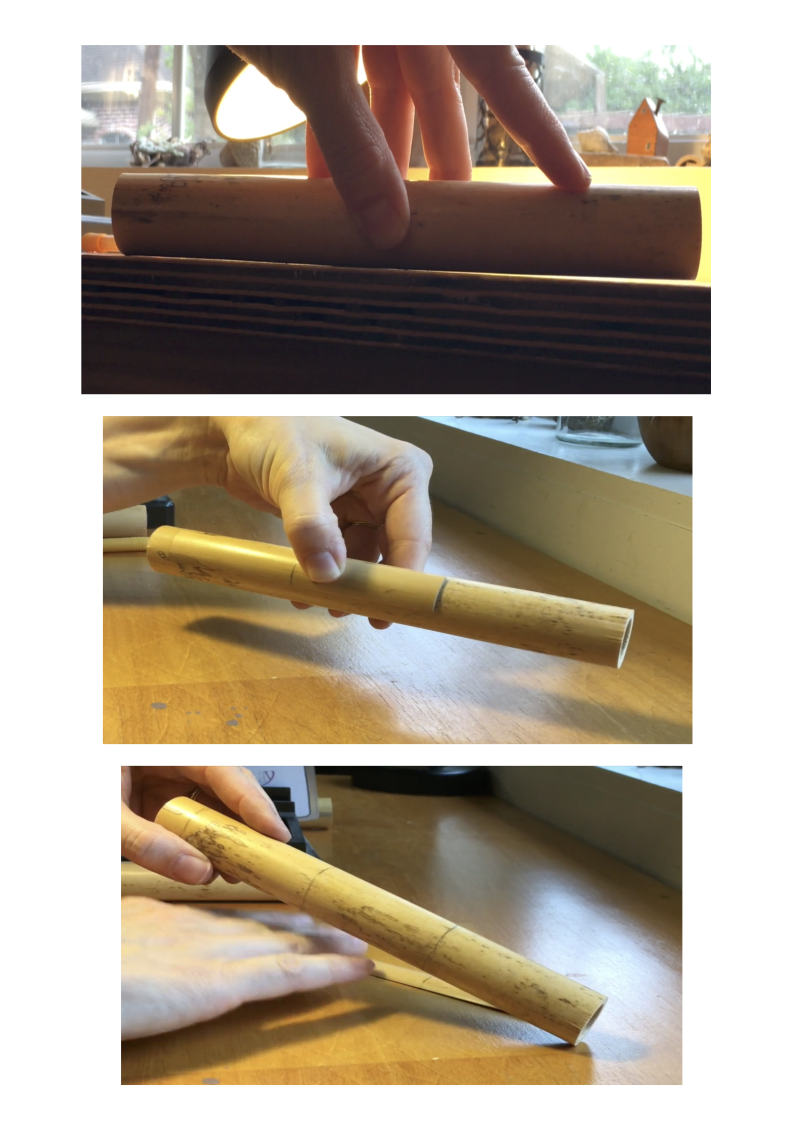
Examples of this process (screenshots from "Splitting Tubes With Rian Craypo, by Kristen Wolfe Jensen), are shown in figure 2. (2) From top to bottom: the gap between the cane and the table indicates where the tube curves (03:16”), Using a spare piece of gouged cane to mark the straightest section of the tube at the correct length (04:05”), a piece of tube cane with the ends and center line marked in pencil (04:53”).
Splitting Methods
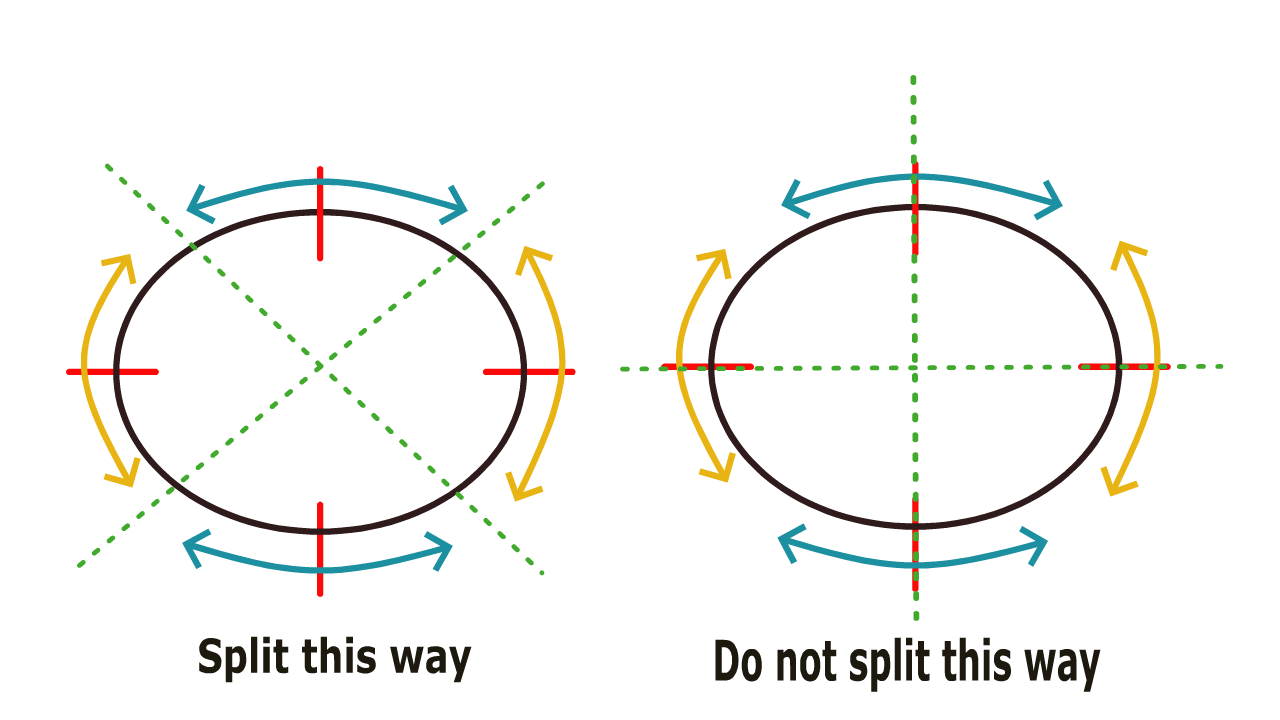
Turn the cane to view one end of the tube. Observe the elliptical shape with two narrower curves, and two wider curves. As Eric Arbiter notes in his book, Way of Cane, it is important to split the tube so that the resulting pieces are comprised of either the narrow curve or the wide curve- not a bit of both. (3) Figure 3 demonstrates this concept. There are two different approaches to splitting tube cane, outlined below.
The Quick Method:
This method uses a cane splitter to split the tubes vertically into four even pieces.I n the video below, Stephanie Willow Patterson recommends visually checking for the “node,” a small bump or flat spot on the inside of the tube. It should be visible on either end of the tube.
Line one blade of the cane splitter up with the node on the cane. Hold the cane vertically on a stable surface, and using a rubber mallet with your other hand, gently tap the handle of the splitter to push the blades down through the cane to separate the pieces.
The Symmetrical Method:
This method takes more time than the “quick method” above, but will help eliminate pieces which are not symmetrical or which have a diameter that is too small or too large to fit into the gouging machine.
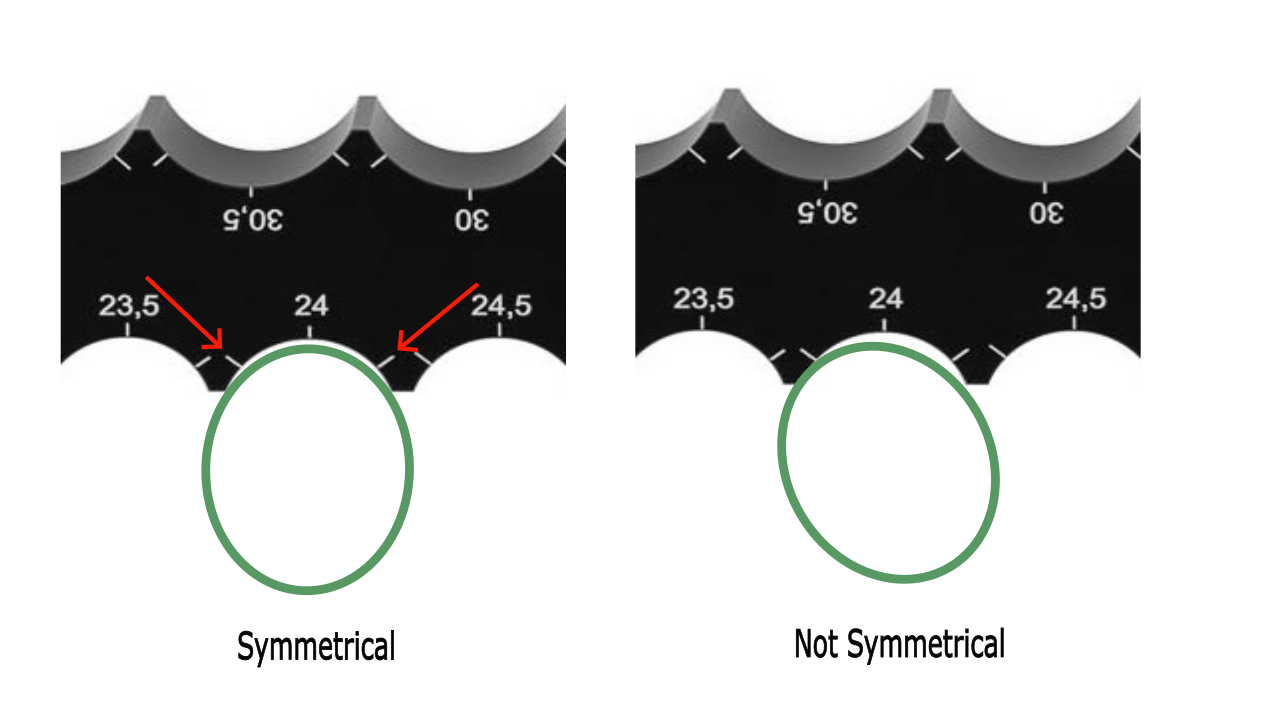
Rian Craypo recommends using a radius gauge to find the apex of each curve along the center line before splitting. The curve of the cane will translate into the reed’s tip opening, so symmetry is a must! Figure 4 shows an example of symmetrical vs asymmetrical curves.
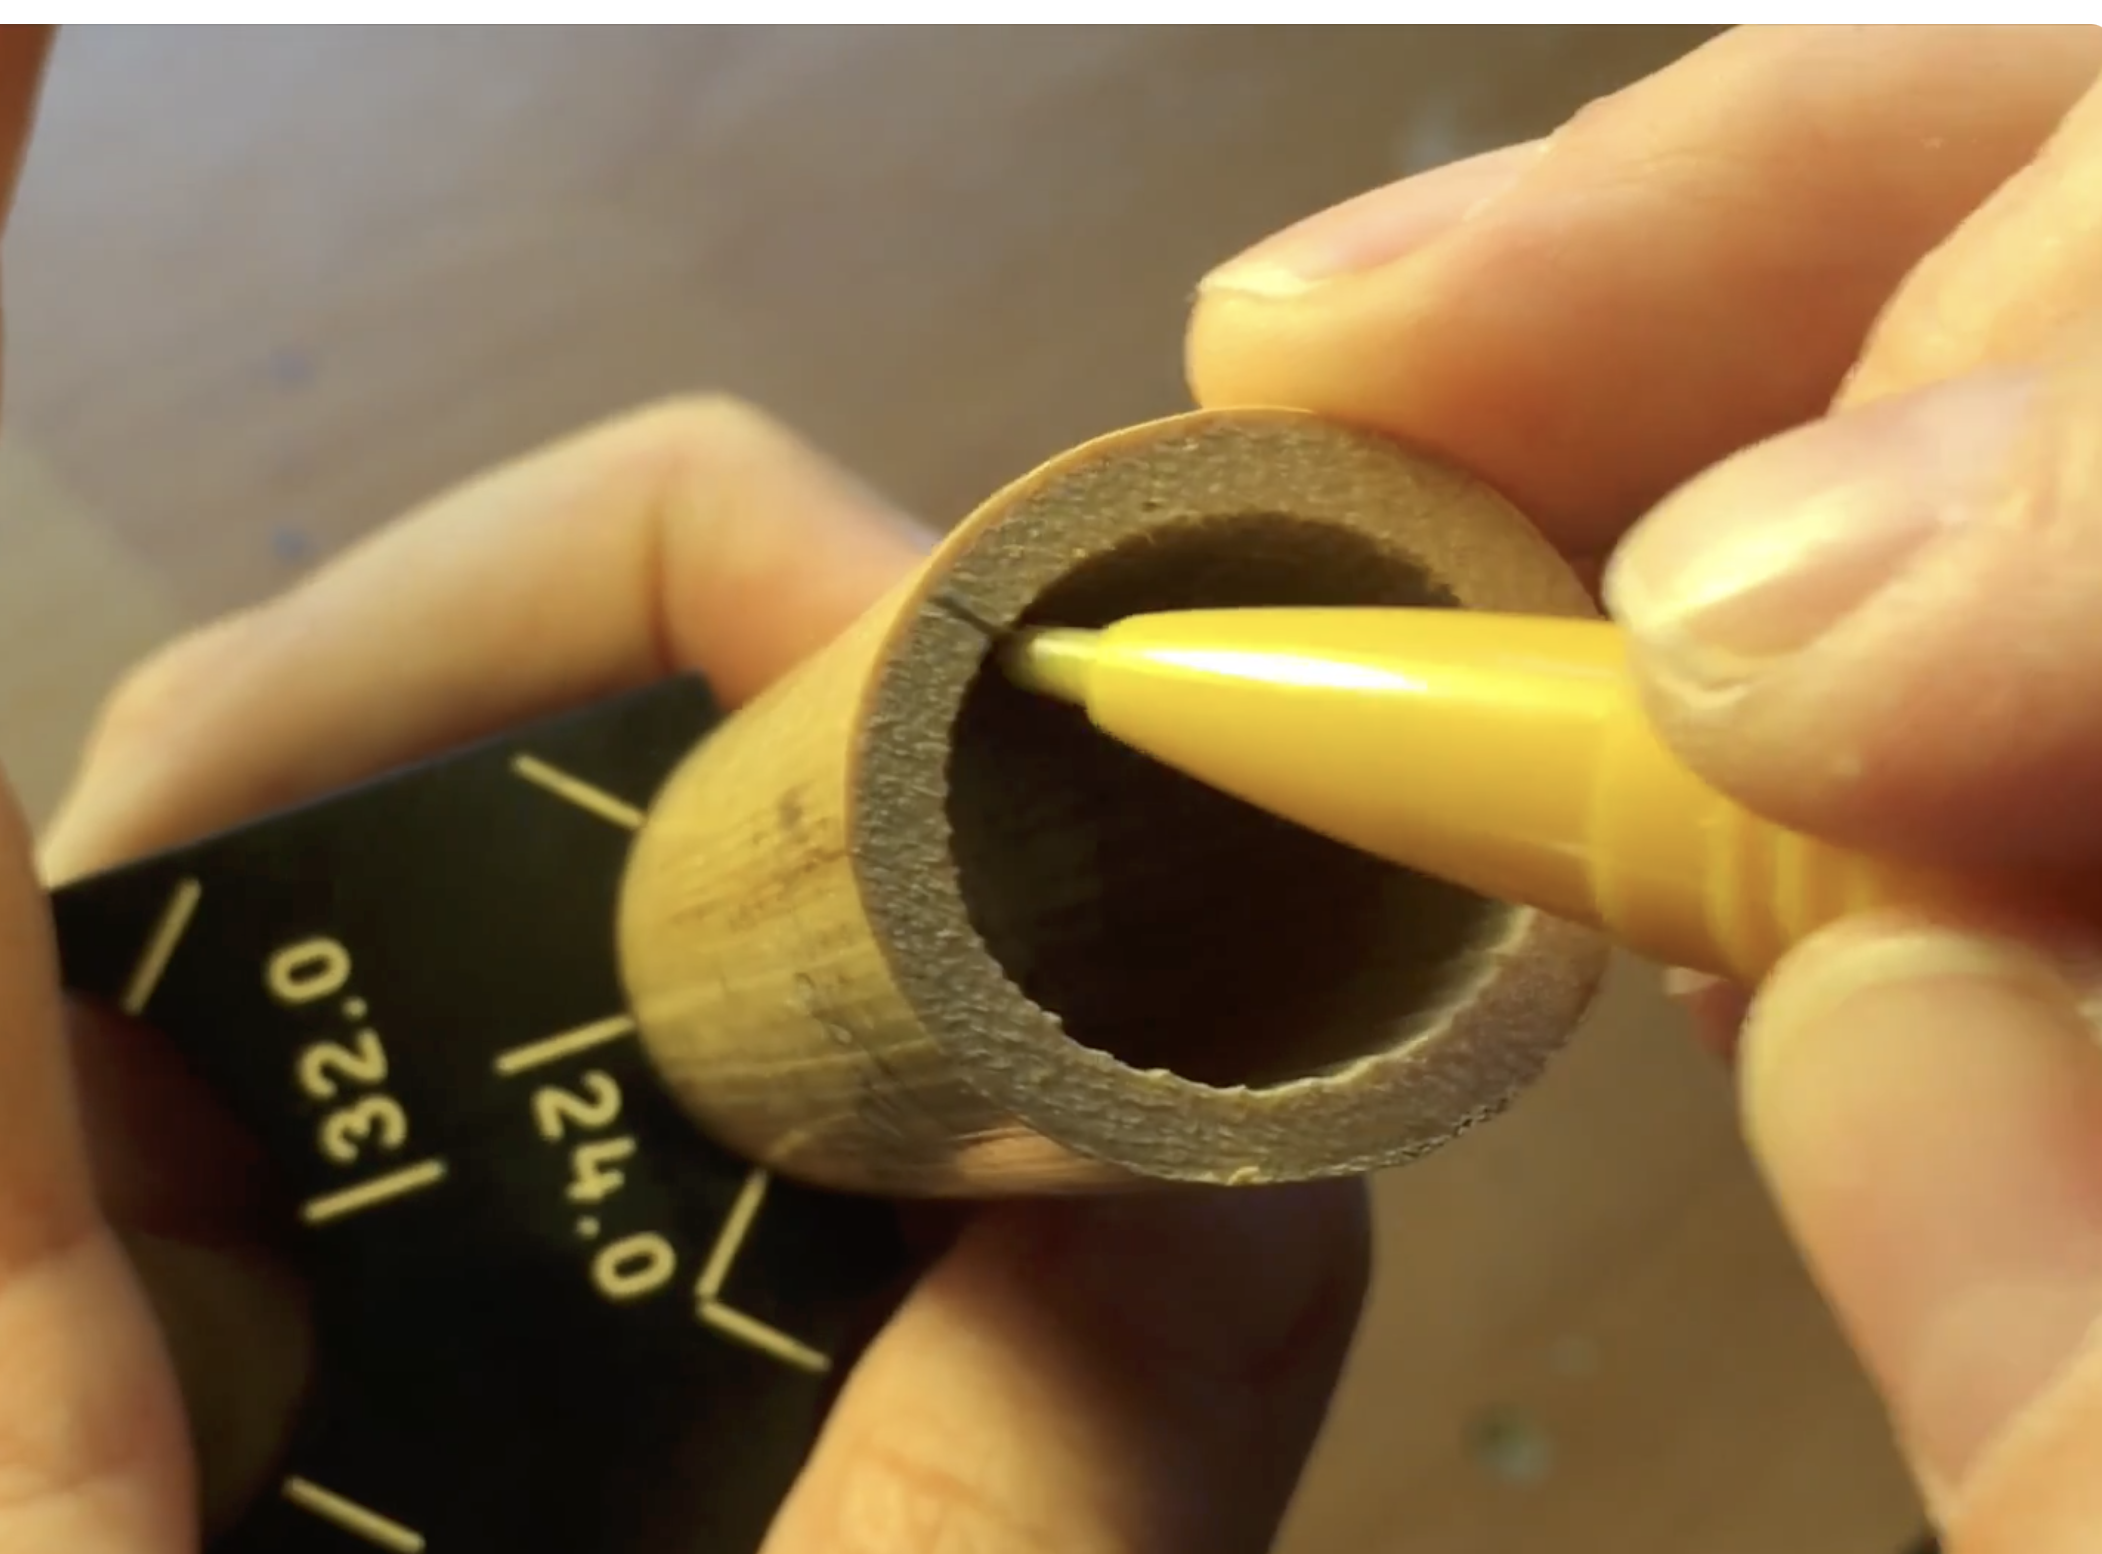
The lines on the Reeds N’ Stuff diameter gauge are used to mark where to split the cane. It is also helpful to mark any pieces that will not be usable. Place the cane into the slot on the diameter gauge, and rotate it to find a symmetrical portion of each curve. Use the lines on the diameter gauge to mark the cane with a pencil, as shown in figure 5.
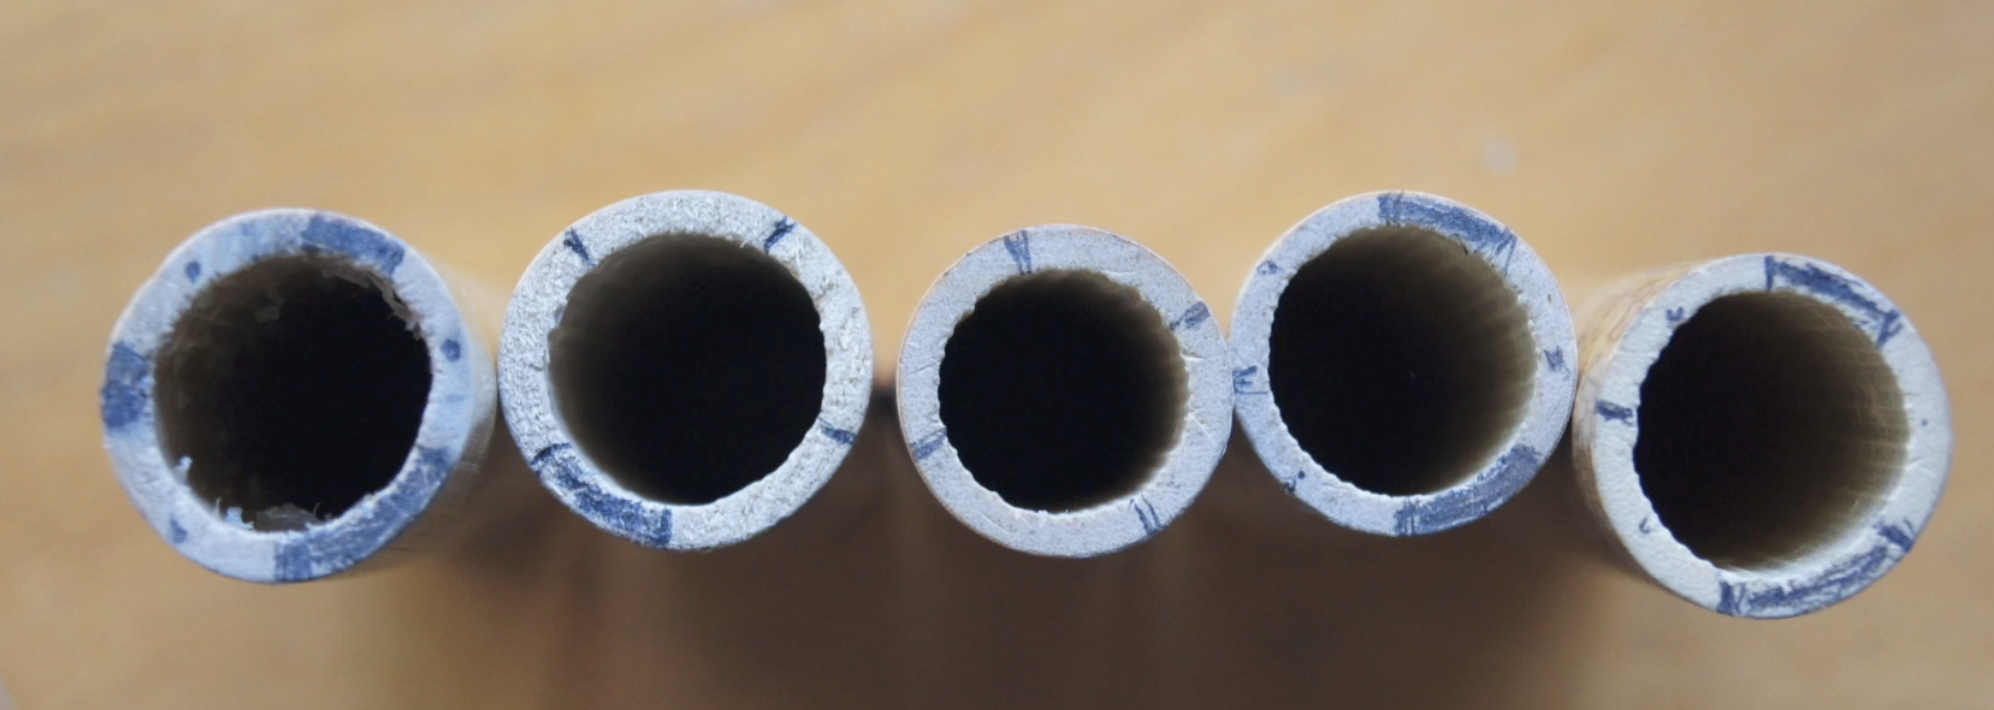
Craypo notes that most tubes will only yeild three usable pieces of cane. It may feel wasteful to eliminate so many pieces of cane at this stage, but rest assured- the remaining cane is more likely to become a usable reed! Common splitting patterns are shown in figure 6.
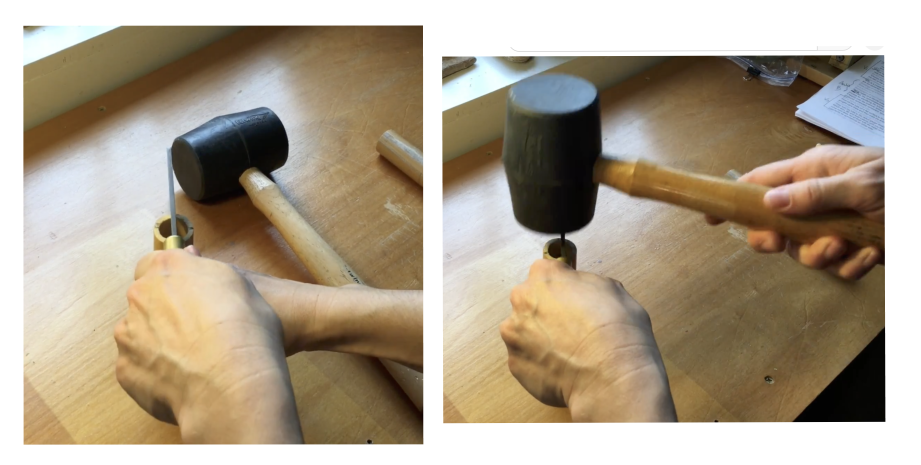
After marking the cane, carefully split the tubes on the lines you have drawn using a razor blade or an old reed knife. If using a reed knife, line it up with your pencil marks. Hit the back of the knife with the rubber hammer to split the tube, as shown in figure 7. Alternatively, line a razor blade up with your pencil marks, and cut down the tube. Be careful not to cut your fingers! The author recommends using a craft knife with a handle instead of a flat razor, but feel free to experiment to find what works for you.
Conclusion
The two videos referenced in this post are linked below. When first learning to split tubes, it can be helpful to see several examples of different methods. With time, you will discover the method that is right for you and your set up. Keep in mind that eliminating cane at this early stage will save time in the long run!
Questions? Contact us through our website or email our bassoon specialist, Dr. Clair Cangialosi at clair@hodgeproductsinc.com
Works Cited
1. Andrew Burn, “Selecting the Right Cane To Make Your Reeds Better,” 2024, Youtube, https://www.youtube.com/watch?v=Q8e4AXQZmgU
2. Wolfe Jensen, Kristen, "Splitting Tubes With Rian Craypo," 2017, Youtube, https://www.youtube.com/watch?v=Qe2UZ-nPgDw&list=PLckbvREGcraxfVp9QXdDdw88LkiEvPqc9
3. Arbiter, Eric. Way of Cane. New York City, NY: Oxford University Press, 2020. 48-50